I’m excited to share this cute little DIY with you guys. With everything slowing down and us laying low at home these days, it has given us the chance to catch up on some projects we haven’t had time to do until now (gotta find the silver linings right)
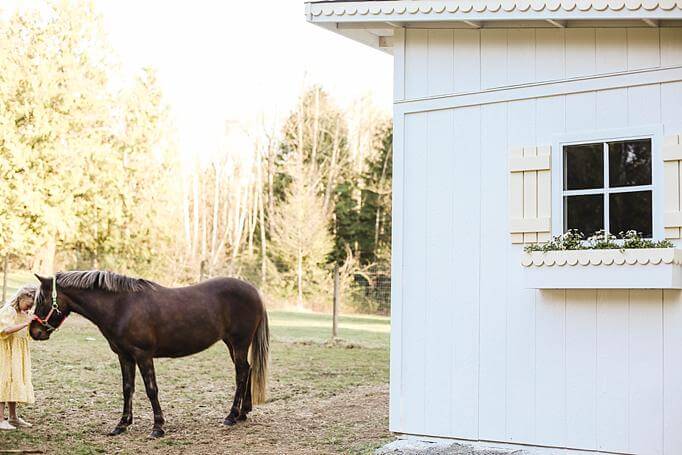
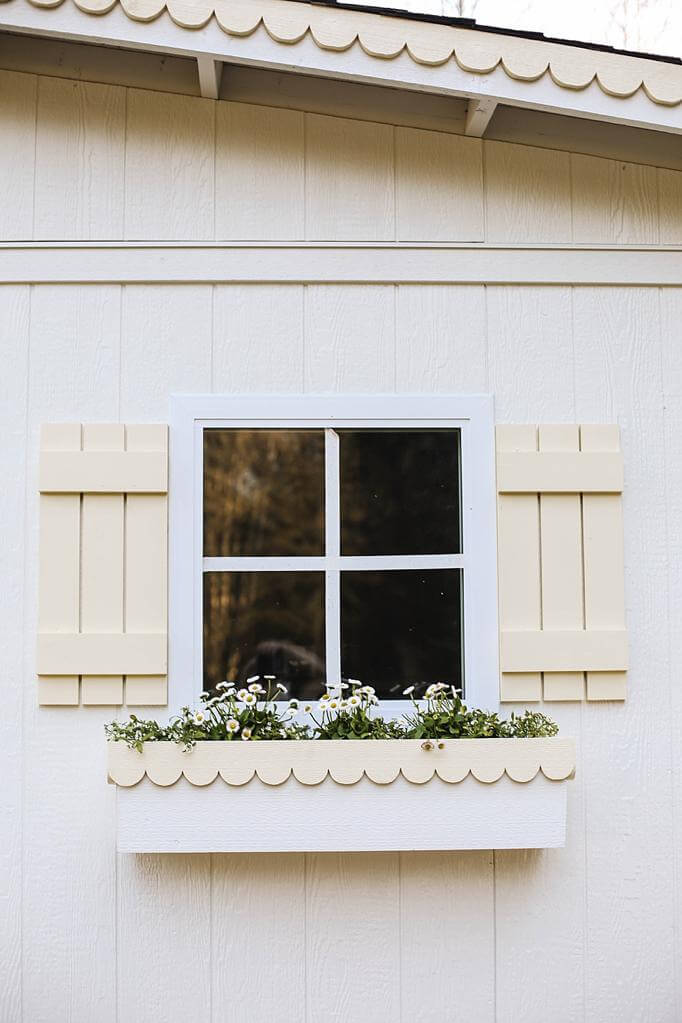
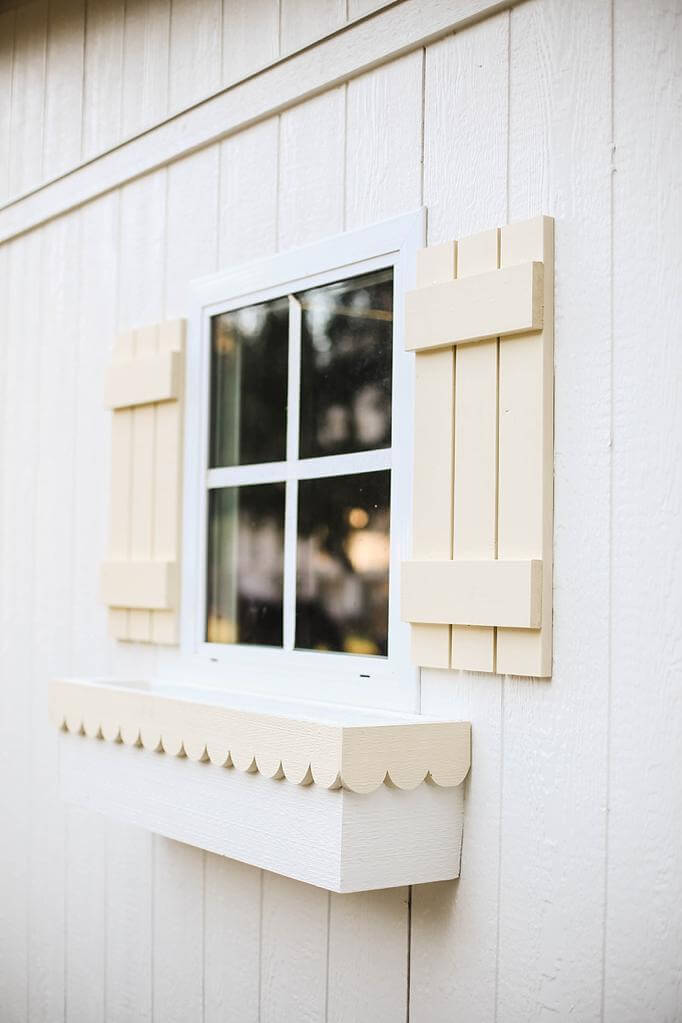
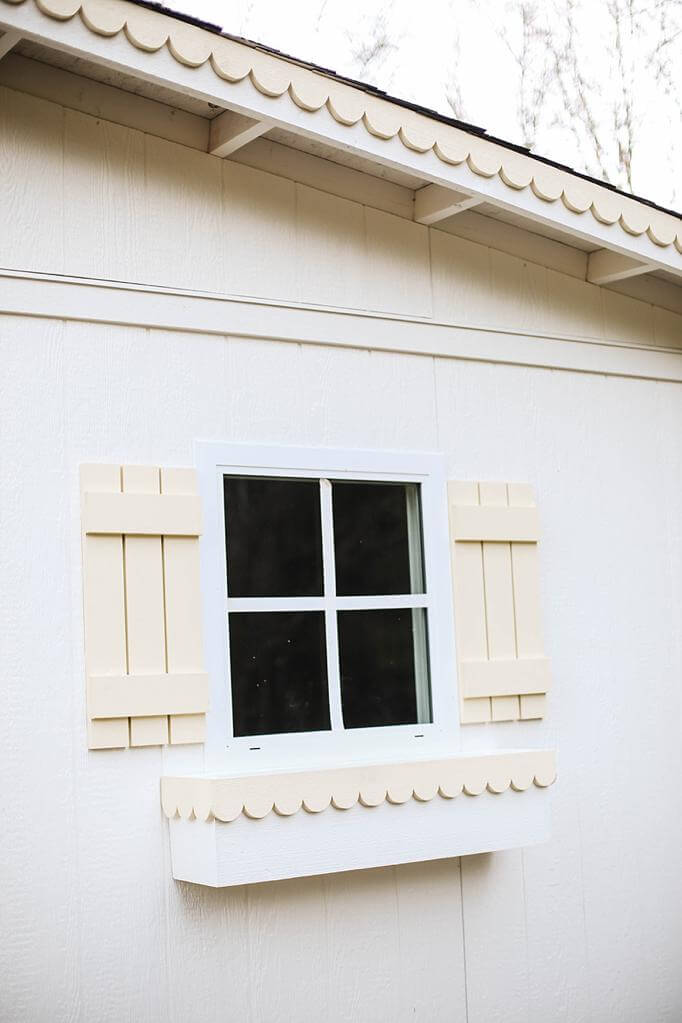
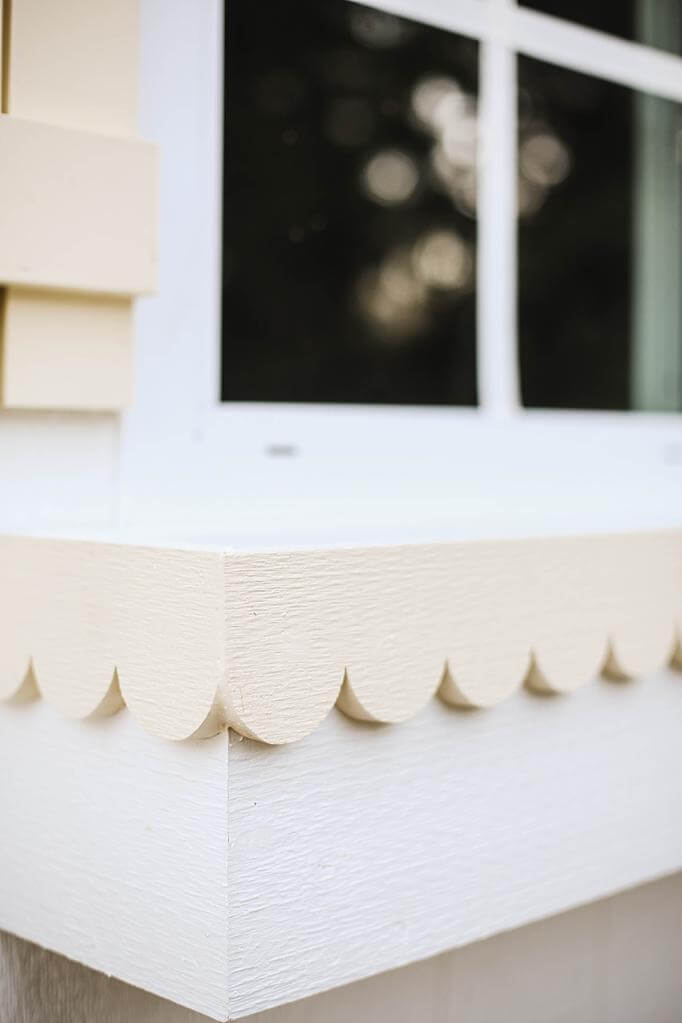
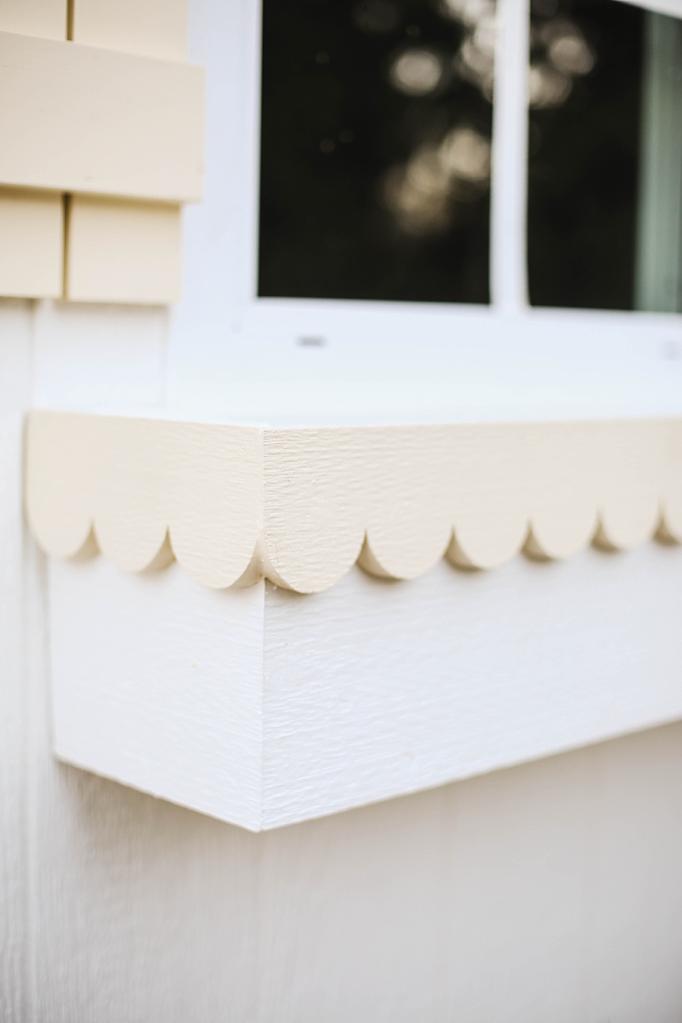
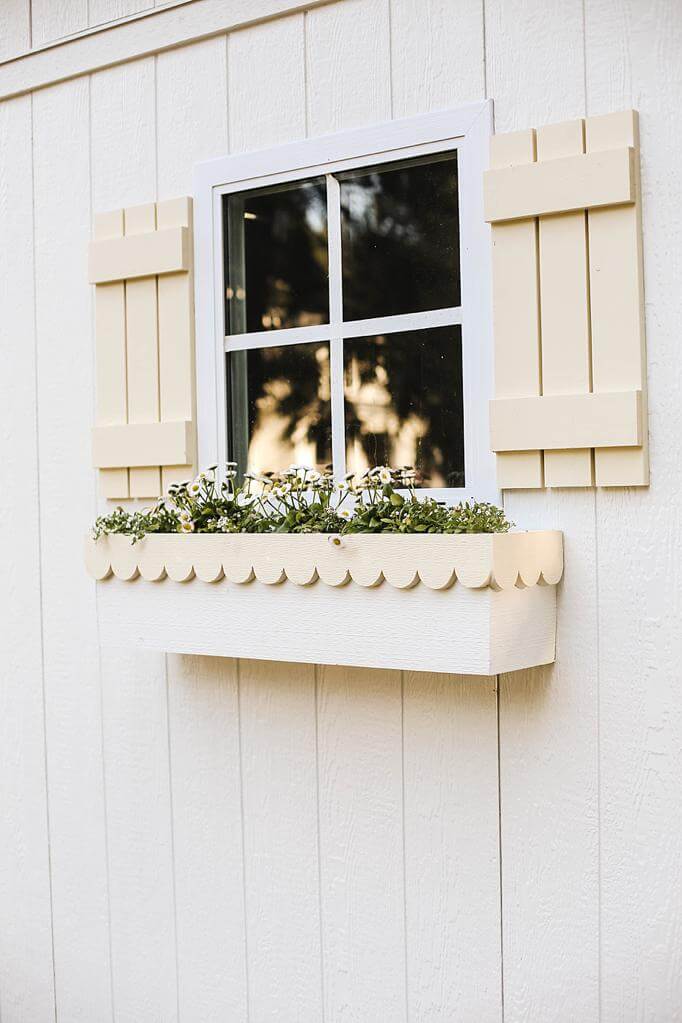
It feels so good to be finally finishing up our little barn/shelter for the pony and I wanted to add a little flower box to the tack room window. Originally I was going to do more of a traditional and simple window box, but literally last minute I had a vision for it and I’m so happy with how it all came together.
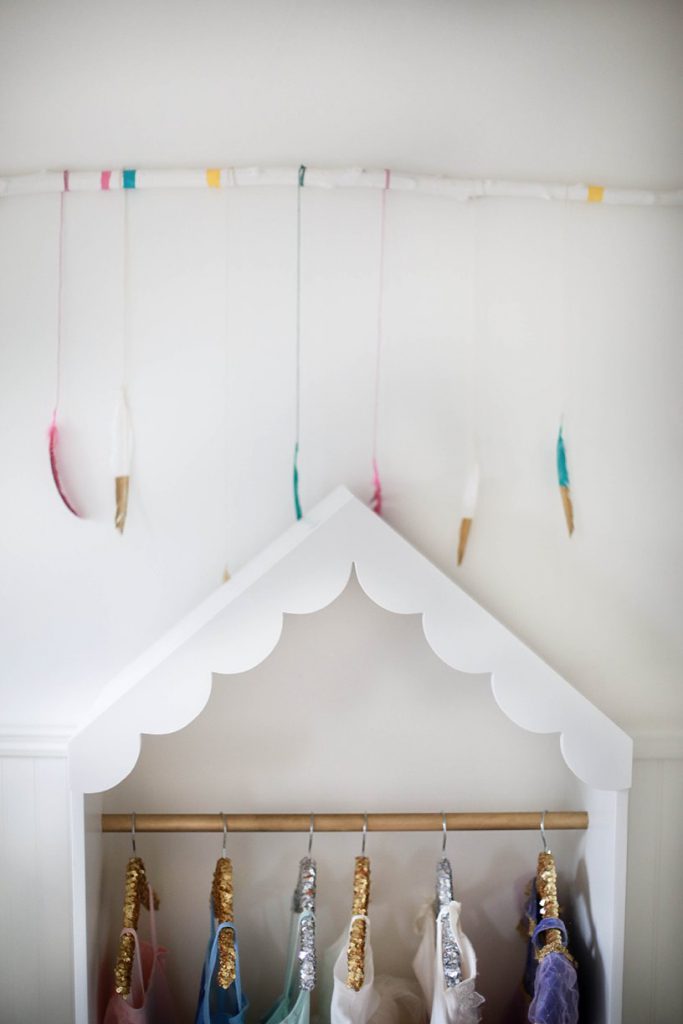
You guys may remember this little dress up wardrobe Steve made Harlan years ago along with it’s little scalloped edge. It kinda pioneered my love for it and when we were designing the barn I knew I wanted that cute little touch added again..
I had Steve make sure he took note of exact measurements, etc.. He is so talented at making/ building things and most of the time he just kinda wings it and creates/ cuts as he goes (kind of like someone who never follows a recipe when they cook).
So I made sure he wrote everything down that he did/ used and he’s given as much detail as he can on how to make it.
Everything we used to make the flower box is from Lowe’s. I’ve been a huge fan ever since we built our house. SO many of the things in our home were from there, so I’m excited to be partnering with them on this quick and fun DIY
Flower Box DIY
Supplies:
All products used from Lowe’s Canada
- 1 – 12’ 2”X10” Primed Facia Board (Actual width is 1 1/4”)
- 1 – 8’ 1”X4” Primed Facia Board
- 1 box of 25 – 3” decking screws
- 1 box of 25 – 1 1/4” decking screws
- Wood Glue ( optional )
- 1 tube of DAP 3.0 100% waterproof exterior Caulking
- Paint of your choice (exterior paint for outside box) *Buy sample colour cans to save money
- – Paint brush
Tools you will need:
- Chop saw ( preferably one that can cut a 2X10 on edge )
- Drill
- Drill bit for whatever head screw you have
- Small drill bit for pilot hole
- Counter sink drill bit ( Or a 1/2” drill bit )
- Caulking gun
- Table saw ( skill saw if you don’t have a table saw )
- Jig Saw
- Drafting Compase
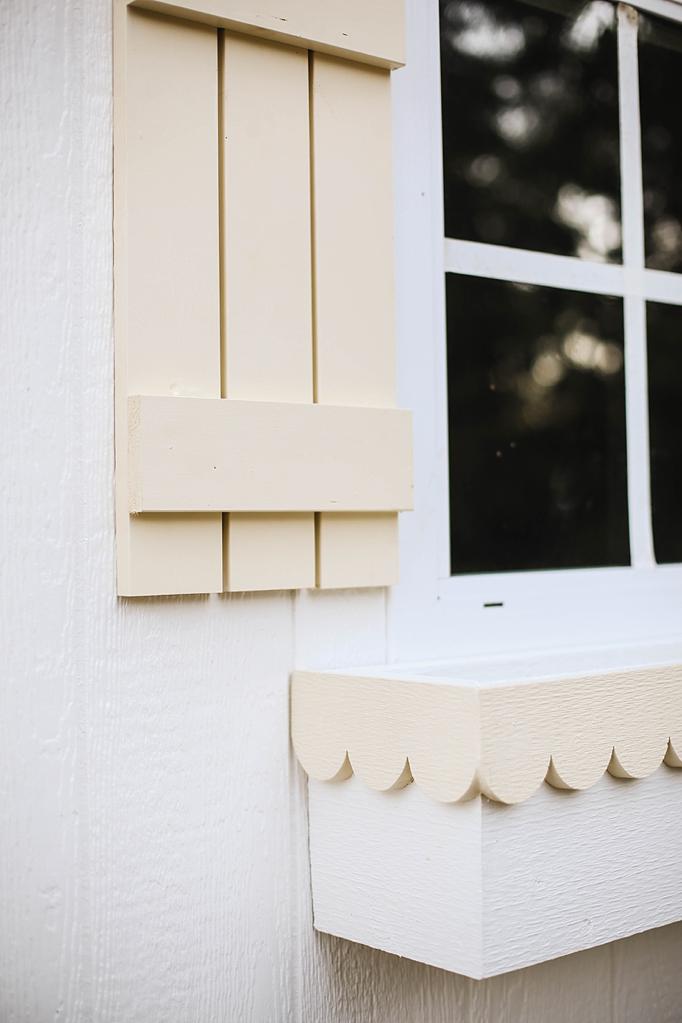
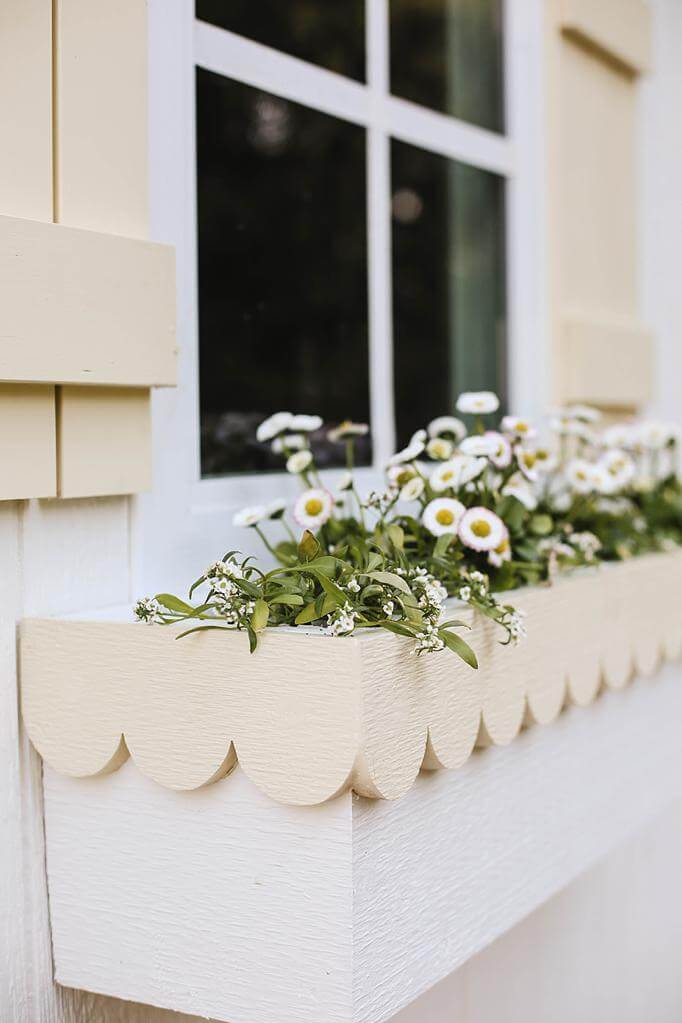
- Sanding spongeThese instructions are based on a 36″ L x 8″W x 10″ H box (not including the scallops)
We based our sizing off of what we thought looked best against/ below the window (just passed the frame of window, see photos for more details)
Directions:
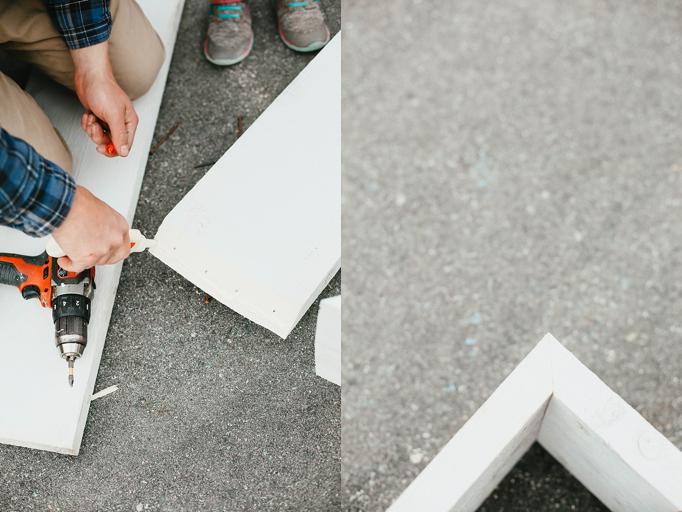
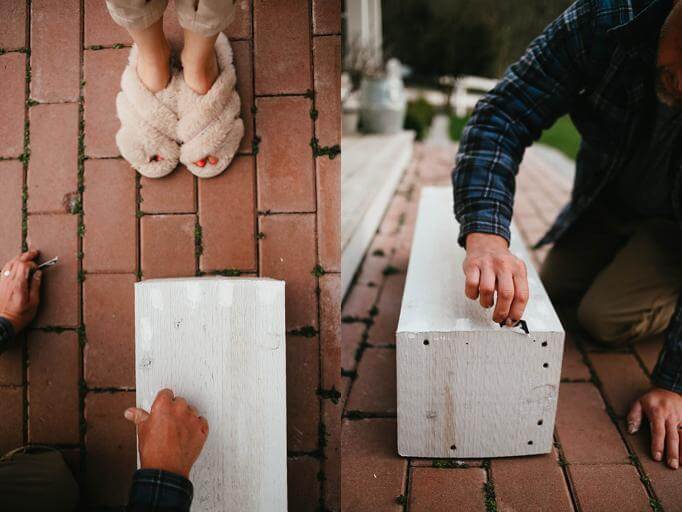
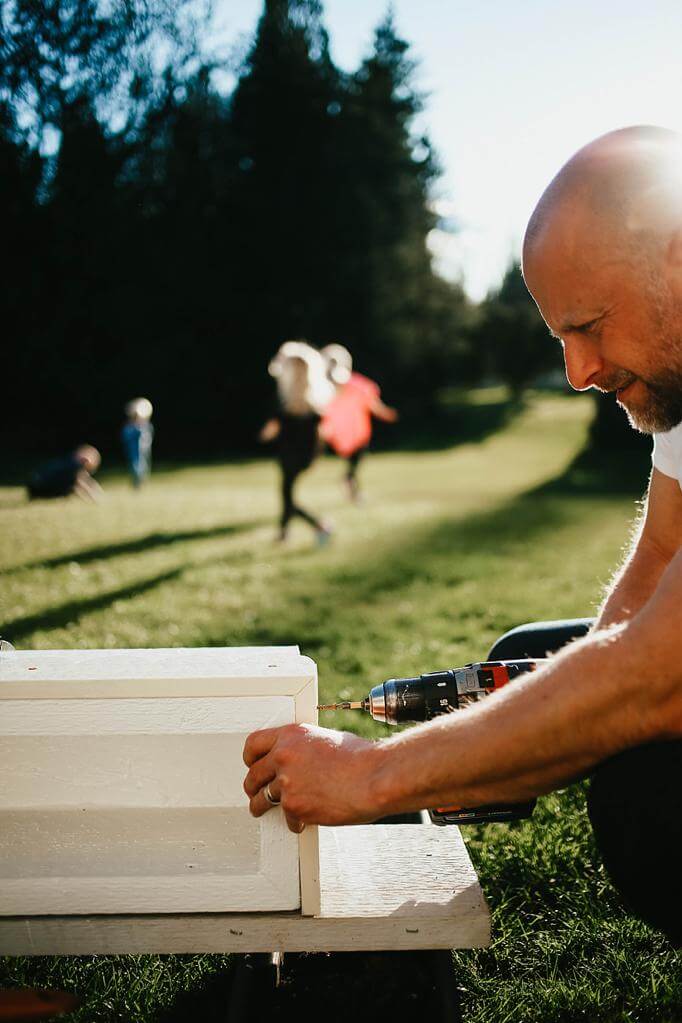
- Cut 12’ 2X10 Facia into 4 pieces. Front and back – 36” and sides – 8”. Cut all pieces on edge at a 45 Degree angle. This will give you a nice square box.
- On the front and back pieces drill 3 pilot holes on each side where screws will go to connect with the side pieces. One top, middle, bottom. ( pilot holes should be just a hair smaller than the screw)
- Apply wood glue in a line from top to bottom over the pilot holes. This will help the corners to stay true in the outside elements.
- Line up front, back, and side and get ready to screw together. This works well on a flat surface
- Start screwing box sides together. Start on one corner and work your way around, screwing in 3 – 3” screws per corner where you drilled your pilot holes. The pilot holes help the wood from splitting. ( Note: when you drill in the corners you may need to line up you corner not square, the screw will want to pull the corner in resulting in an un even corner. you will know what I mean when you try the first one. )
- Ones all corners have been glued and screwed together you will need to cut the base. Using the chop saw cut the remaining 2X8 down to 33 1/2” long.
- Using the table saw rip the 33 1/2” base piece down to 5 1/2” wide this will fit in the base.
- Before you put the base in you will want to drill a pilot hole roughly every 6” and use the counter sink bit lightly on the pilot hole. This will leave a nice clean hole easy to caulk later.
- Place the base piece in and make sure it is nice and flush. Again this is easier on a flat surface. Use 3” screws and start screwing in the base piece.
10. Use caulking (DAP 3.0) to fill the screw holes and any cracks
11. Once caulking is dry, use two coats of paint on base
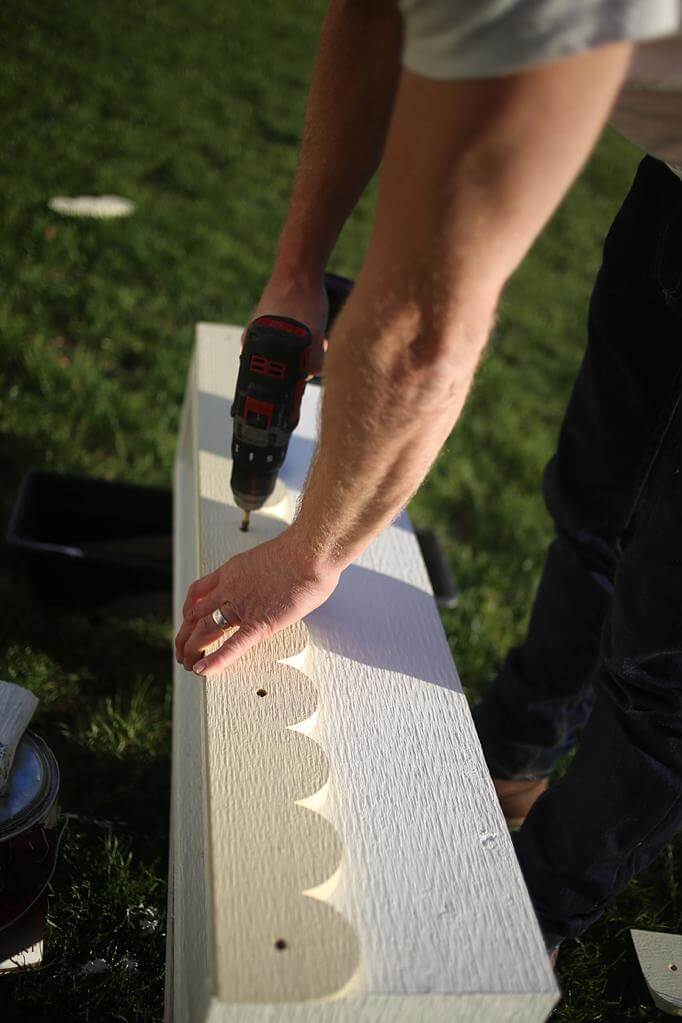
12. While each layer of paint is drying, make the scallops
13. Using the chop saw, cut the 1×4 facia on a 45 degree angle on both sides (37 1/4 inches long)
then, cut two 8 and 5/8 pieces for the sides (one side will be a 90 degree cut the other a 45 degree to match the front piece.
14. Once you have the pieces cut, set your compass to 1 1/2 inches and make essentially make/ create half circles along the bottom of the 1×4 facia (practice this a few times on some scrap pieces of wood until you find your groove)
15. After the scallops are laid out and traced on the 1×4 facia, use a jig saw to cut scallops.
16. Drill pilot holes and counter-sink holes on scallops then paint.
Once dry, mount scallops onto the top of the flower box with 1 1/4 ” screws in the pre-drilled screws (making sure the front corners are good and tight)
*If there are any gaps or cracks, use caulking to blend/ fix*
caulk screw holes
Once dry, add final touch-up of paint and it’s ready to hang!

Wood glue
Filling in the screw holes with caulking
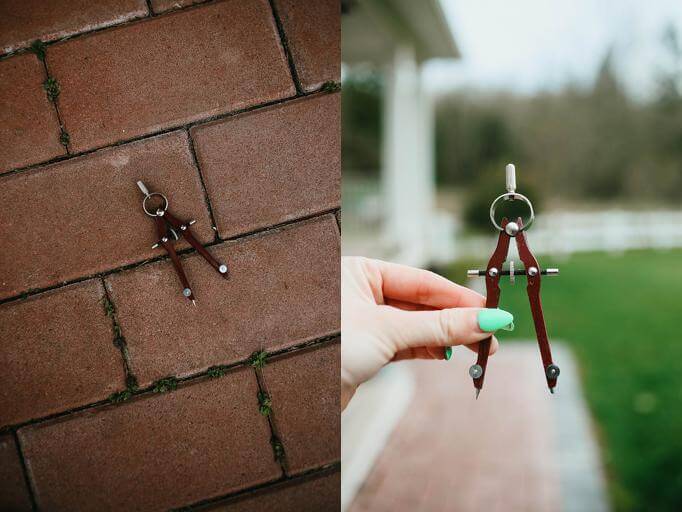
This is the compass he used to make the scallops

Do two coats of paint on finished box
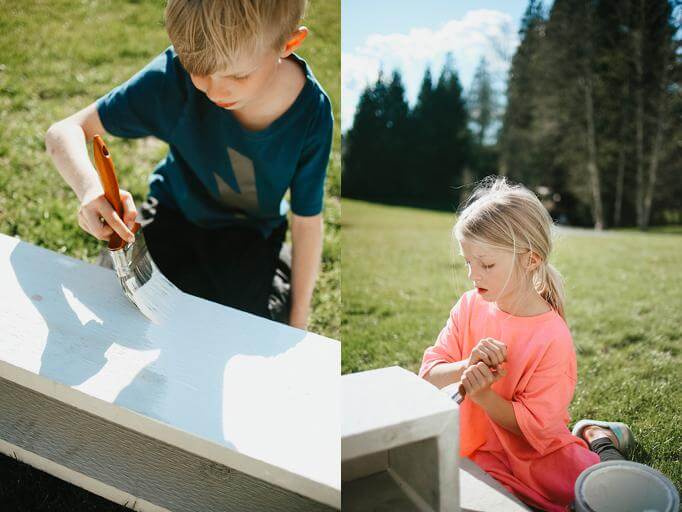
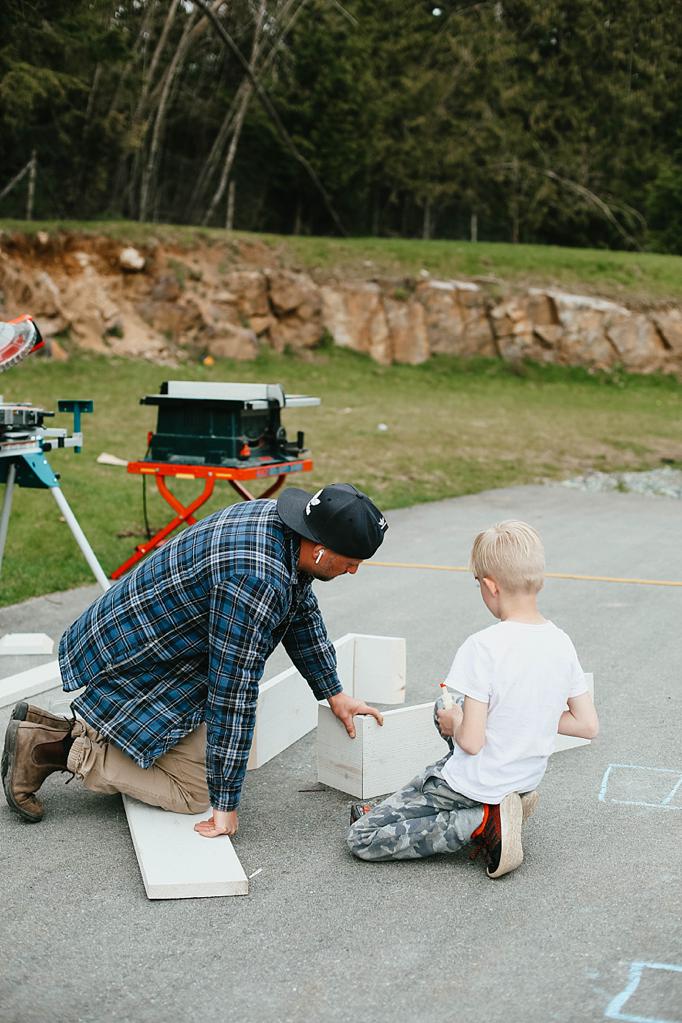
We got the kids to help build and paint the flower box
– Let’s just call this woodworking class 😉
Screw the scallops onto the top of the box

Filling the holes on the scallops with caulking (then you will need to touch up with pain after it dries)
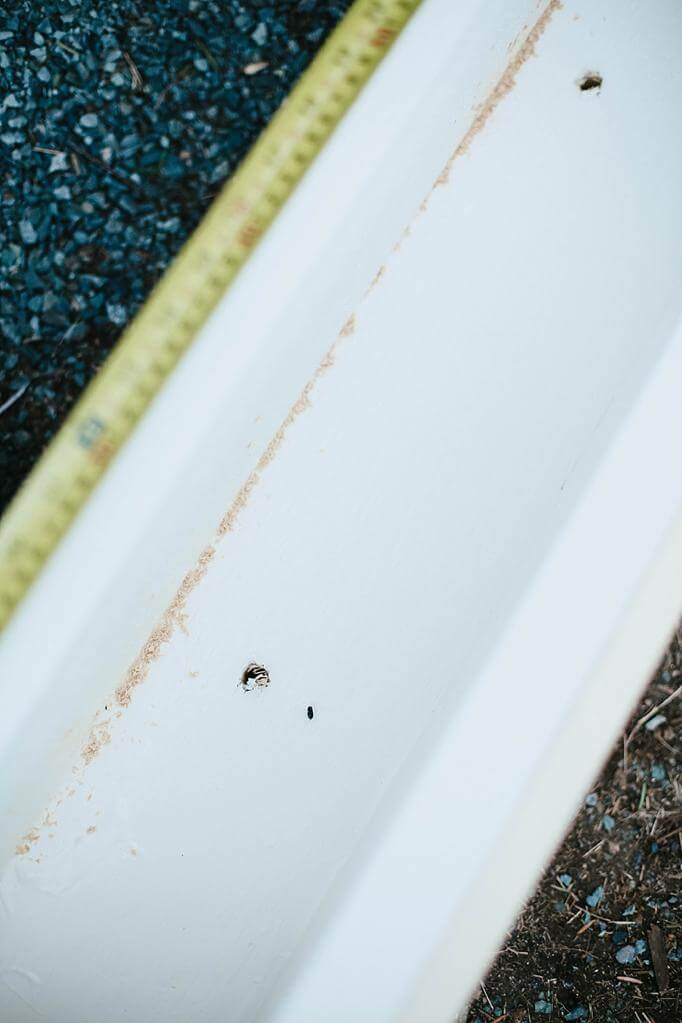 Drill holes on the bottom so the water can drain, if need-be.
Centre the box on the window and screw the box to the studs located behind the wall

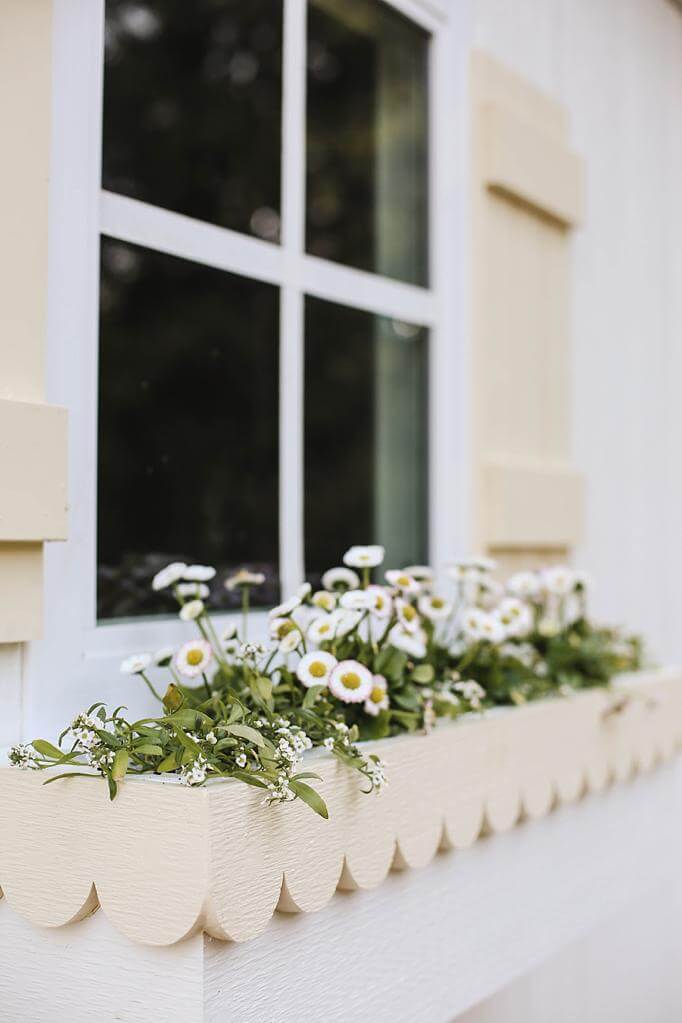
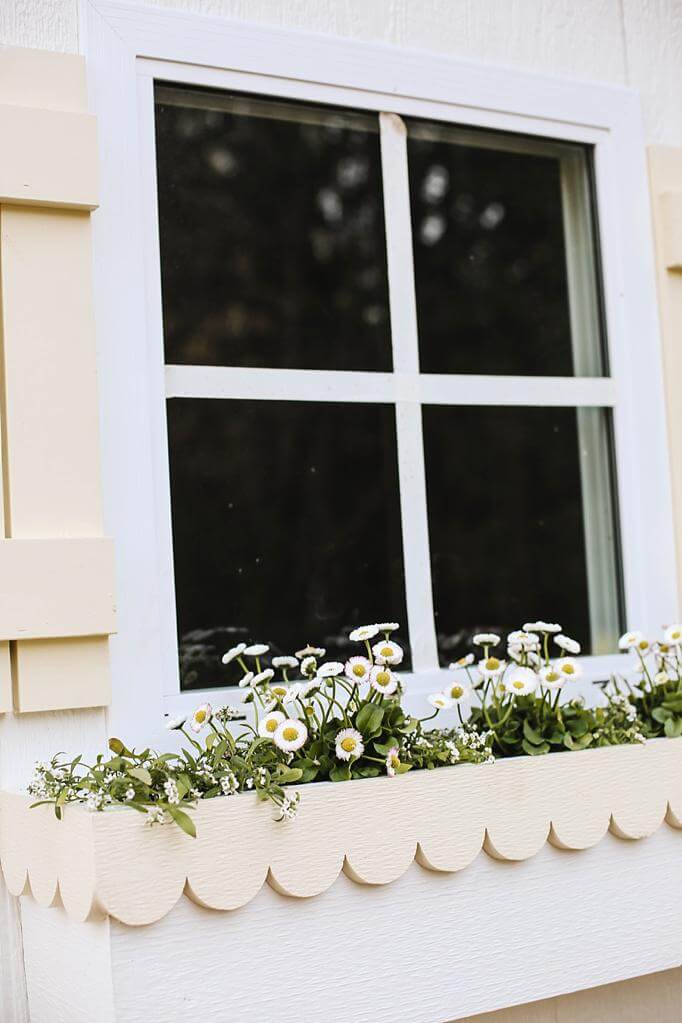
After it was hung we added soil and flowers to it (that the pony pulled out the next day, of course;)
|
Voila, there you have it! I am so happy with how it turned out. Let me know if you guys try this out and send me pics or tag me if you do!
This post is a paid partnership with Lowe’s Canada
and their #LayingLowes Campaign
but the words and feelings are all mine. Thank you for being here and supporting me, it means so very much!